Table Wizard
This wizard is used to create tables or edit existing ones. For example, if you navigate to Setup > Tables, select an item in the table tree and click New, the following wizard is shown:

General Tab
This tab lets you set the table's label and provides default values for the name and the plural label.
Graphics tab
This tab lets you choose or upload an icon for the table.

Fields Tab
- This is where the bulk of table work is done. Fields are listed alphabetically by label and may be created, edited, and deleted from this screen.
- Relationships between tables are created and edited here through special field types.
- Creating a field does not make it show up in a form unless you both add it to the Layout and give groups viewing permission.
 e
e
Types of data Fields
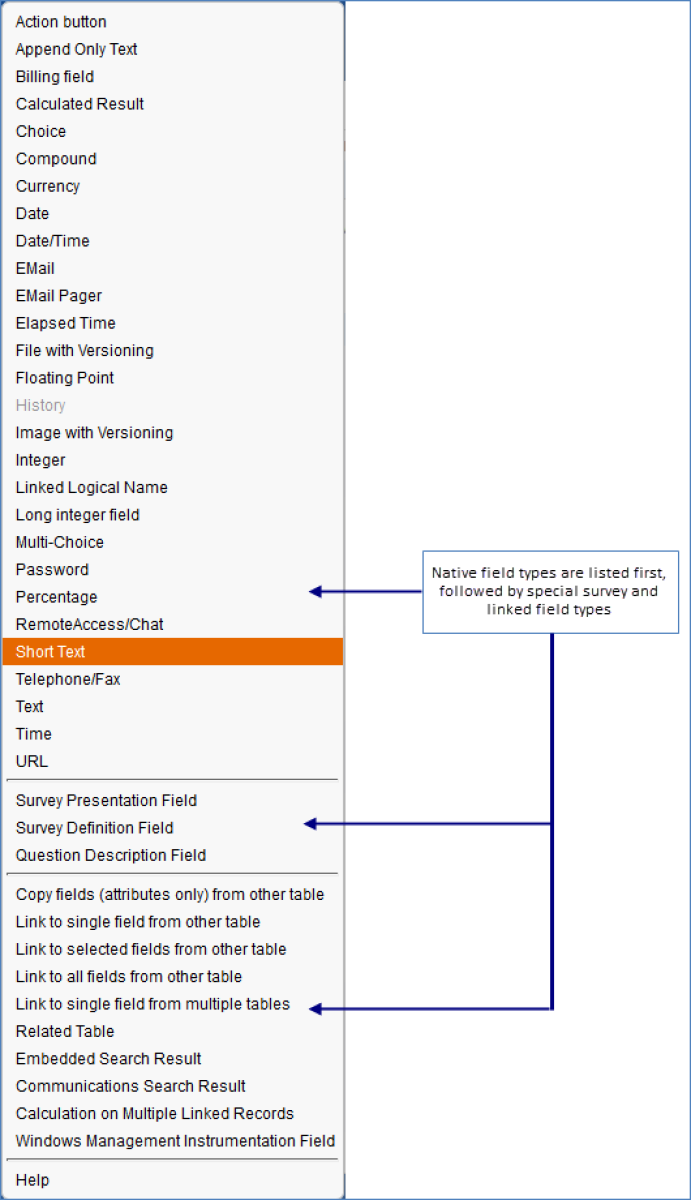
Each data type may have options specific to it, but many options are the same for most types:
- General – Provides the name of the field and basic type information
- Options – Defines if field is dependent, required, what type of input is used
- Permissions – Allows an existing field to be copied to set permissions for all groups for new field
- Display – Defines further display characteristics, input and popup instructions and placement
Rules and Workflow Tabs
Create or view rules and workflow specific for this table directly from the Table Wizard.


Layout
Fields will not appear until you add them to a layout.
There are two distinct layouts for every table: one for staff and the other for the EUI: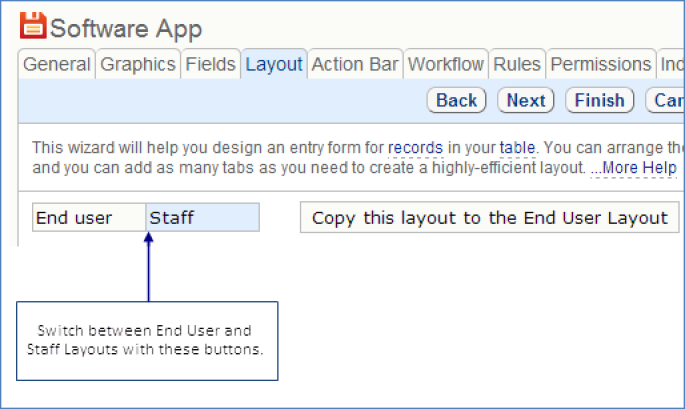
Layout Tab
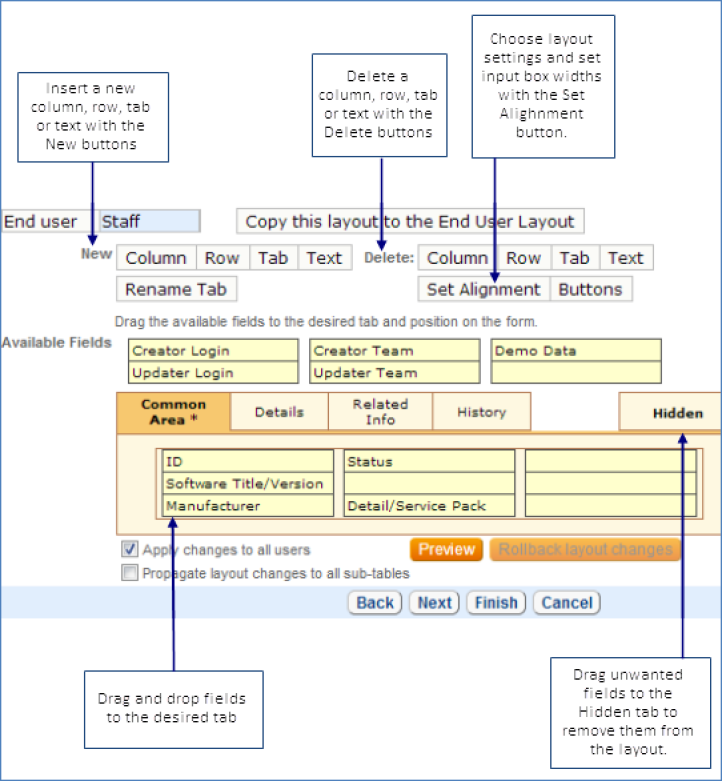
Please note a special Common Area section for dragging-and-dropping fields. This section will appear as the first tab and you can drag and drop fields into it just as you would with tabs normally. When viewing a record using the layout, any fields in the Common Area will be shown above the other tabs, near the title, rather than underneath the tabs where the other fields are shown.
A good use of the Common Area is to put critical fields that are relevant to multiple other tabs there, such as ID, customer name, etc. It is possible to put all types of fields to the Common Area, including Linked Fields, required fields, dependent fields and so on. It is possible to create headers for the Common Area.
Indexes

You can create indexes for specific fields of a table that are important so that speed will be improved when running a saved or advanced search on those fields.
It is also possible to turn off the full text indexing on tables in which it is not relevant or useful, and this will speed performance on those tables (communications tables, for instance).
To set up a field index, go to Setup/Tables/select a table/Edit/Indexes and click the New option. Typically you will want to index only a single field at a time, but it is also possible to create a compound index by choosing multiple fields. When you save the index setting, the system will take the time to index the selected field immediately.
Indexing fields such as Status and/or Assigned to, as an example, can speed the performance of saved searches based on those fields.
Record Ownership
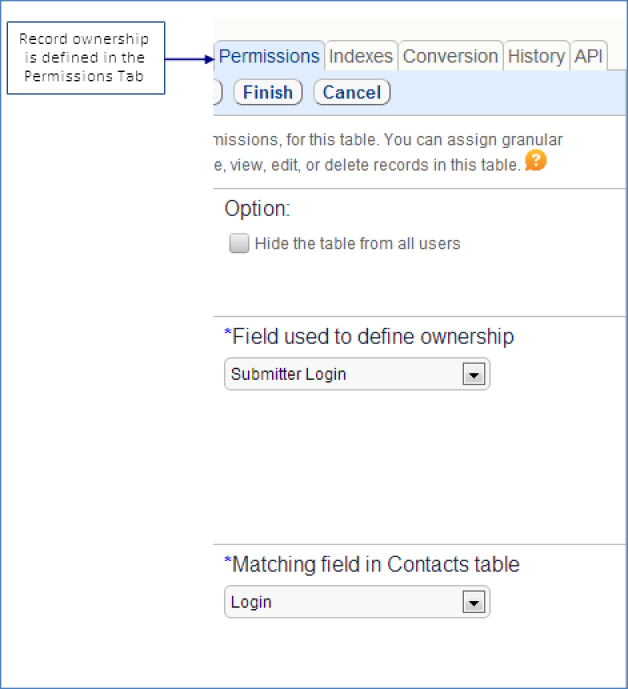
Which records are "My Own" ?
- Generally the owner of a record is defined as a single person - either an end user or account representative.
- However, end users can only edit their own records, so if they need to be able to edit others' records, ownership needs to be defined more broadly – e.g., when the Company field of the record matches the Company field of the user.
- If "my own" is defined more broadly, you may need to add record permission filters to prevent some people from seeing all of their own records.
Example
Privileged end users at a company can edit others' records, but normal users should only see and edit their own – you can apply a filter in the group permissions for which of their own records a user can view or edit.
Permissions Tab-Record Permissions
- Permissions control in this tab is not as fine as through the Setup/Access/Manage Groups menu. Do your initial permission setup here, but always refine them from Setup/Access/Manage Groups.
- This tab defines only record level permissions for the table – field level permissions are defined in Manage Groups screens.
Conversion
Conversion is a very useful feature – it allows you to auto-create new records in one or more other tables, mapping values from fields in the current table.
- It can be used to convert leads into contacts, companies, and opportunities.
- It can be used to generate new records from a set of base records on a regular basis (monthly to do's from a set of scheduled recurring tasks).
- It can be used to reassign records from the wrong table to the right table (i.e. if customers submit an issue to the wrong table).
- It allows you to collect information in one table and then populate it to several other tables automatically.
The maximum number of possible conversion mappings is 99 per table.
Setting up Conversion Rules
- Example – let's set up conversion of our reseller orders into a company and end user record.
- Keep in mind:
- To retain links between tables, it is important to convert the source table for linked fields before the target table. For example, if the Company table contains links to the Contact table, convert Company first, then Contact if the Contact table contains a link back to fields in Company.
- If you want to preserve links during conversion, be sure to map the linked fields with the same values from source table.
- Conversion can be done manually by a user, or automatically via a Rule. (In a Rule, when the record meets some criteria the conversion is run). If conversion is run by a user, the new record can be edited as well as converted from the original source.
Conversion Permissions
Many customers use action buttons with conversion rules to enable staff to perform record conversion (creation of a record in another table with fields mapped from the current record). They do not want users to see the Conversion button on the menu bar, which brings up a different kind of dialogue, but they want users to be able to interact with the rule conversion action, for instance, by being able to fill out the new record fields as part of the conversion.
We added a new permissions option on the Record permission tab of the Group permission wizard and separated conversion permissions into two options:
[x] Show conversion button on menu action bar
[ ] Allow interaction with conversion rules
If the option 'Allow interaction with conversion rules' is checked, then all four kinds of rule action conversions work no matter what the user's new record create permissions are (if option 3 on the conversion wizard is selected, the new record screen appears with fields based on user's group permissions, just as it did in the previous release).
But if the option to allow interaction with conversion rules is set to No, then when a conversion action is run by a rule, the following logic is applied, depending on the option selected for the behavior of the conversion action:
- silent conversion - runs silently, record is created in background without user' knowledge.
- conversion dialogue - runs silently, creates record in background, brings up confirmation when done.
- new record page - runs silently, creates record in the background, brings up confirmation when done.
- automatically with confirmation - does the conversion and shows the result.
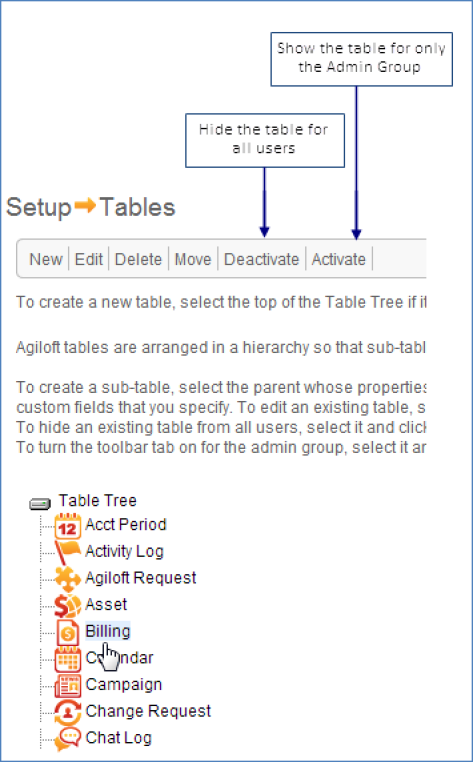
Deactivate/Activate Table
Once you've added the table, you might want to hide it later at some point.
Table may be hidden from all users by using either the Deactivate button on the table tree or the option 'Hide from all users' on the permission tab of the table wizard. This option cannot be simply deselected. If a table has been hidden from all users, it may be unhidden from only the admin group by using the Activate button on the table tree wizard. To make it visible to other groups, Setup > Access > Manage Groups must be used. Admin should edit the appropriate group, select the desired table and scroll down on the Table tab to the option 'Show Table on a Toolbar Tab'.