The Action Button data type creates a button that contains a chain of actions that are activated when the button is clicked. Action buttons can be designed to perform an endless number of possible functions: because they can run almost any of the standard action types, you can use action fields create buttons that run actions, which allow users to run all kinds of possible functions on command while performing normal record workflows. For example, you can use action buttons to send emails, update fields , update or linked records, print documents from a template, or all of those sequentiallyand more.
See Actions for more information on the available action types.
| Info | ||
|---|---|---|
| ||
These are just some examples of how action buttons can be appliedThe out-of-the-box system includes many action buttons, some of which are described below. Action buttons can:
|
| Tip |
|---|
It's often a good idea to use a "Button:" prefix when labeling action buttons. This makes it clear which fields are buttons when managing layouts. It also groups all the buttons next to one another on the Fields tab of the Table wizard, which helps to organize your fields. |
Adding Actions
Create an Action Button
You can access the Actions wizard in several ways, but the easiest way is to select Setup [Table] from the table where you want to create the action.
- From the top nav bar, expand the table's drop-down and select Setup [Table].
- Select the Actions tab in the Table wizard.
On
Inthe General tab of the
setupwizard,
define the system behavior before executing the action.- Make sure the Execute Actions check box is selected, and click Add Action.

- The Actions library opens, with the create action buttons at the top, and the list of available actions for the table displayed at the bottom. This is the same as the Actions tab in the Table wizard.
- If you want to create a new action, click the relevant button and walk through the setup for that action type.
- In the And drop-down, define any additional options, and specify the system behavior after executing the actions.
Otherwise, select one or more actions from the list and click Finish to add them to the action button.
| Note |
|---|
If you select multiple actions, they will be added in alphabetical order. |
Add Wait Point
The Add Wait Point button is used to force the system to wait for the preceding action(s) to complete before running the next action or moving to the final step defined in the "After executing actions" section. Wait points are automatically added after the last action in the list, but they can be placed after any of the actions in the button sequence by dragging the wait point to the desired location.

Wait points are useful if, for example, one of the actions brings up a new window for a manual conversion or runs actions on records in a related table that should be reflected in the table record before proceeding. If you add wait points, you can also define the time limit in seconds to wait before the next action runs. With multiple wait points, they all use the same time limit.
Action Button Display
In the General tab of the action button setup, you can define how the action button should be displayed. This will appear in both the record form and the table view. Action buttons in the action bar will always be displayed as plain text links.
The options are:
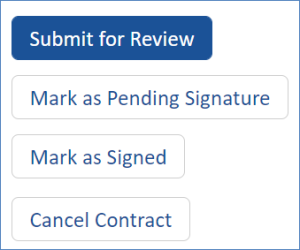
- Button with text - This shows a button labeled with the text you enter. This style can be configured in the Form Action Buttons settings of the Forms tab of the look and feel scheme.
- Image hyperlink - This replaces the button with an uploaded image. These images are the same ones available in the Graphics tab of the Table wizard. You can use a new image by clicking Select/manage > Upload.
- Text hyperlink - This displays a text hyperlink using the text you enter. Sometimes using a text hyperlink can be useful to align the action button with other fields, save space, or better match the style of the form.
In the Display tab, you can also define whether the button should have a description and whether it should display a label. If you do not wish to use a visible label apart from the button text, select "When viewing this field, show Neither the label nor the instruction".

The label and instructions are often not needed for action buttons, since the button text should give enough information on what will happen upon pressing. The exception to this is if you are using an image hyperlink for the button.
Button Placement
Action buttons can be placed in the following areas of the system:
- On the record layout, where the actions will affect the current record. They can be activated in either view or edit mode of the record.

- In Table Views, where action buttons will affect the record they are linked to.

- In the table action bar, where they will appear as hyperlinks. These actions will affect all selected records in the table view.

Because of the complexity of the possible starting points, it is important to test every method by which the button can be pressed and to take that into account when deciding whether the action button saves the record before and/or after executing the actions.
| Note |
|---|
If you are executing the actions from any context other than record edit, there is no need to save before executing the actions. Even if the field option says that it should save before executing, it will not save the record. Likewise, there is no need to save afterwards, unless you want to open the record after running the actions. |
Order of Operations
In the General tab of the action button setup, you can define the order of operations of how actions should run, and what operations should be done before and after the actions. This is important to understand, because triggering operations out of order can cause unintended consequences such as rules running on linked records before the record updates are complete.
Record Saving when Running Actions
Before and after running the actions, you can choose whether to save the record, with some further options on the record behavior when saving.
Saving Before Actions
If the action button will be clicked while the record is being edited, some changes made in the current editing session will only be available to the actions in the action button if the record is saved before executing the actions. Most field changes are stored in system memory and can be used by actions without saving first, but some data types are not. You should test the behavior of the button before committing to the order of operation here.
Saving After Actions
The options in the "After executing actions" section also allow you to save the record, with some choices for what to do when the record is saved.

If the action button is making changes to the record during the editing process, it is best to save afterwards and confirm that any changes made by the button are saved to the record regardless of the user's permissions or whether they decide to cancel or save the record further down the line.
You can choose whether the save should close the record, open it again in edit mode, or open it in view mode.
- If you save it and open it again, you can also define which record tab it should open to for staff and end users. This can be helpful to guide the record workflow for users, in cases where the record has a large number of tabs.
- If saving and opening it for editing, you can choose whether to validate required fields. If you deselect this option, it will act similarly to an autosave. For more information on these options, see the section below.
In other cases, you can keep the record open and trust the user to save the record. If you choose the Do Nothing option, the screen stays the same for the user; you can also use the option to "Navigate within the same record to a specified tab and position" to lead the user to the next part of the form they need to complete.
Validate Required Fields and Run Rules
By default, record saving will trigger the following operations:
- The system will check to make sure that all mandatory fields have a valid entry.
- Any rules that have a condition of being applied when the record is edited, and "Run rules" enabled, will be triggered.
- The record default values such as Date Modified will be updated.
In the action button, you can disable these operations by deselecting the "Validate required fields" and "Run rules and update default values" check boxes.

These options can be useful in cases where for instance a record contains a large number of tabs, and a user wishes to use an action button to save the current state and send something forward before the final tab, while still continuing to work on it.
In the After Executing Actions section, the "Validate required fields" option is only available when choosing to "Save and Open record for edit." This is in order to prevent the record being closed in a state where mandatory fields have not been filled in. By default, both options are selected for existing action buttons where the "Save record" option is selected.
| Note |
|---|
Exercise caution when deselecting these options as there is a possibility for records to be canceled in the middle of being created, placed in a state where mandatory fields are incomplete, or prevented from being acted upon by normal table rules. |
give the button a name and label.
Tip It's often a good idea to use a "Button:" prefix when labeling action buttons. This makes it clear which fields are buttons when managing layouts. It also groups all the buttons next to one another on the Fields tab of the Table wizard, which helps to organize your fields.
- Select how the action button is displayed. The chosen display appears in both the record form and the table view. Action buttons in the action bar are always displayed as plain text links. Three display types are available:
- Button with text: This shows a button labeled with the text you enter. For buttons, also select whether the button is primary or secondary, which determines the visual style of the button. Button styles can be configured in the Look and Feel on the Forms tab. You can also configure the style of navigation buttons, such as Save, Cancel, or Next.
- Image hyperlink: This replaces the button with an uploaded image. These images are the same ones available in the Graphics tab of the Table wizard. Use a new image by clicking Select/manage > Upload.
- Text hyperlink: This displays a text hyperlink using the text you enter. Sometimes using a text hyperlink can be useful to align the action button with other fields, save space, or better match the style of the form.
- Define the system behavior before executing the action(s). You can choose to do nothing or save the record. If the button is clicked while editing the record, it's usually best to save. Otherwise, saving is unnecessary. See Saving Before Actions for more information about saving the record before executing the action(s).
Select the Execute Actions check box and click Add Action. The Actions screen opens.
Create a new action, or select an existing action and click Finish.
Note If you select multiple actions, they will be added in alphabetical order.
If desired, click Add Wait Point to add wait points between actions. Wait points force the system to wait for the preceding action(s) to complete before running the next action or moving to the final step defined in the "After executing actions" section. For example, if one of the actions brings up a window for manual conversion, and the following action makes use of the results of that conversion, adding a wait point between the actions can be useful. When you add a wait point, they are automatically added after the last action in the list, but they can be placed after any of the actions in the button sequence by dragging the wait point to the desired location.

Note If you add wait points, you can also define the time limit in seconds to wait before the next action runs. With multiple wait points, they all use the same time limit.
- Select whether the action button executes any additional tasks, such as adding a note, opening a URL, or others. See Additional Tasks for more information.
- If the button runs a series of actions that take some time, and you don't need to show the user the end result, select the Run in Background checkbox to allow the actions to run without forcing the user to wait.
- Define the system behavior after the action button executes its actions. You have a few options, including doing nothing, closing the record without saving, navigating within the record to a specified tab, or saving the record. If the button is clicked while editing the record, it's usually best to save. If you choose to save the record, see Saving After Actions for more information.
- Enter Admin Notes describing the purpose of the button. Admin Notes are especially important for action buttons so that other administrators know the purpose of the button.
Options Tab
- On the Options tab, select whether the field is deletable.
- If desired, add one or more conditions to enable conditional visibility. Conditional visibility is often used with action buttons to control when they can be clicked, and it persists in table views. If the record doesn't meet the conditions for the button to appear, it doesn't appear in the table view, even if it has been added.
- Skip the section to add conditional editing. Action buttons are not edited, so this section has no effect.
Permissions Tab
- On the Permissions tab, select which groups are able to view the action button for each regular permission. If a group can view an action button, they can usually execute it. Action buttons cannot be edited, so you can ignore the edit permissions.
Configure the special "Allow these groups to execute actions..." permission. This is a unique setting that allows a group to see and therefore execute an action button on a record if they only have view access to the record. If this is active for a group, the user does not need to have edit permissions or record creator status for a record to execute the action button.

Note Permissions are an important consideration when you create action buttons. For more information on how action buttons work with permissions, see Action Button Permissions.
Display Tab
- On the Display tab, enter any pop-up text or input instructions.
Select whether to show the field label or input instructions. Usually, it's best to use the button text to give the user the necessary information to understand the button's actions. The most common exception is when an image hyperlink is used for the button without any text.

- If you choose to display the field label or input instructions, select their placement relative to the action button.
- Click Finish to save the action button.
Saving Before and After Actions
When creating action buttons, the General tab of the Field wizard allows you to define when records are saved with action buttons and which operations are triggered. Triggering operations out of order after saving a record can cause unintended consequences, such as rules running on linked records before the user has finished updating a record.
Saving Before Actions
It's often a good idea to save the record first before clicking any actions buttons. Some changes made in the current editing session are only available to the actions in the action button if the record is saved before executing the actions. Although most field changes are stored in system memory and can be used by actions without saving first, some data types are not. Make sure to test the behavior of the button if you're choosing not to save the record.
| Note |
|---|
If the action button is clicked from any context other than while editing a record, there is no need to save before executing the action(s). Even if the field option says that it saves before executing, the system does not save the record. Likewise, there is no need to save afterwards, unless you want to open the record after running the action(s). For more information on the contexts from which action buttons can be clicked, see Action Button Placement. |
Saving After Actions
If the action button makes changes to the record during the editing process, it is best to save afterwards to confirm that any changes made by the button are saved to the record. Otherwise, if a user decides to cancel out of the record or fails to save the record at a later time, any changes made by the action button may be lost.
When you're saving the record after actions are executed, you can choose whether the save should close the record, open it again in edit mode, or open it in view mode.
- If you save it and open it again for viewing or editing, you can also define which record tab it should open to for power users and end users. This can help guide the workflow in cases where the record has a large number of tabs.
- If you save it and open it again for editing, you can choose whether to validate required fields. If you deselect this option, it acts similarly to an autosave.
If you choose not to save the record, you can either choose to do nothing, close the record entirely, or navigate within the record to a specified tab and position.
Validate Required Fields and Run Rules
By default, record saving triggers the following operations, whether you save before or after actions run:
- The system checks to make sure that all mandatory fields have a valid entry.
- Any rules that run when a record is edited are triggered.
- The record default values are updated, such as the date modified.
You can disable these operations in the action button by clearing the "Validate required fields" and "Run rules and update default values" checkboxes.

| Note |
|---|
Exercise caution when deselecting these options because there is a possibility for records to be canceled in the middle of being created, placed in a state where mandatory fields are incomplete, or prevented from being acted upon by normal table rules. |
The "Run rules" option is particularly useful in cases where a record contains a large number of tabs. In these cases, a user may want to continue working on the record but use the action button to save the current state and run the associated action(s), triggering any edit rules.
The "Validate required fields" option is helpful in cases where records have one or more required fields. When you save after actions, this option is only available when choosing to also open the record for editing, which helps prevent the record from being closed in a state where mandatory fields are incomplete.
Action Button Placement
Action buttons can be placed in the following areas of the system:
- On the record layout, where the actions affect the current record. They can be activated in either view or edit mode of the record.
- In Table Views, where action buttons affect the record they are linked to.
- In the table action bar, where they appear as hyperlinks. These actions affect all selected records in the table view.

Because there are so many paths users can take to run actions, it's crucial to test every method. Consider these paths when deciding when the action button saves the record, and which actions are executed.
Additional Tasks
...
Aside from the available action types, there are a number of options tasks that can be selected by clicking the And drop-down menu after the actions.

you can run with action buttons. To add a task, select it from the And drop-down menu on the General tab of the Field wizard for action buttons.

Available tasks These include:
- Running an ActiveX script
- Opening a URL
- Making a Skype call
- Adding a Note
- Opening the Working with Email wizard to create an email
- Sending a PayPal payment
In the rest of the wizard, the Options, Permissions, and Display settings are the same as those on other action types. However, there is one unique permission on the Permissions tab.
...
- Sending a PayPal payment
Opening a URL
If you select Open a URL, it will be opened the action buttons opens a window at the specified URL and may include variables from the recordURL. The URL can be provided manually, by fields in a record, or with a Script action. If the action button opens a script in a window with a URL that is defined by a Script action, the last script in the list of execute actions could may use EWset::setRedirect to define what this the URL should be.
If you enter the URL manually, the URL must use special syntax and, in some cases, a formula.
- If you want to open a static URL, enter your URL enclosed in double quotes, such as "http://www.agiloft.com" or "http://www.customurl.com."If you want to open a URL where the main address depends on some record data, concatenate the parts of the URL by enclosing the static parts in double quotes and placing plus signs in front of field or variable names that are prefixed by a "$" sign. For example, if your record contains a field named “company,” you could specify a URL like "http://www." + $company + ".com" to go to the company site. Note that you should not use
urlEncode()in this case, which is discussed next.URL, enter your URL enclosed in double quotes, such as "https://www.agiloft.com" or "https://www.customurl.com." - If you want to open a URL where parameters that occur after a URL where the main address depend depends on record data, you can concatenate the parts of the URL by enclosing . Enclose the static parts of the URL in double quotes and enclosing , enter the field names prefixed with a "$" sign, and combine each part with a plus sign. For example, if your record contains a field named Company, you could specify a URL like "http://www." + $company + ".com" to go to the company site.
- If you want to open a URL where parameters that occur after the main address depend on record data, concatenate the parts of the URL and use the
urlEncode()function. Enclose the static parts of the URL in double quotes, enclose the field names prefixed with a "$" inurlEncode(), and place a plus sign between the different parts of the URL.- URL parameters are easy to identify because they come after an equals (=) sign. For example, if you have a URL such as
urlEncode(), placing "$" signs in front of the field or variable names and plus signs between the different parts of the URL.- Such URL parameters are easy to identify because they come after an equals (=) sign. For example, if you have a URL such as "http://www.agiloft.com?login=myLogin&password=myPassword," then "login" and "password" are URL parameters, with "myLogin" and "myPassword" being the parameter values.
- To compose a URL where parameters occur after the main address and use fields from the current record, you could use a URL like "http://www.agiloft.com?login=" + urlEncode($myLogin) + "&password=" + urlEncode($myPassword).
Note title Note on urlEncode() Every web server detects parameters and their values in a URL string by locating "?," "&," and "=" characters. That means that a URL parameter value should not itself contain any of these characters, otherwise the web server will not be able to recognize the correct parameter value. To avoid this confusion, each parameter that uses a field variable with "$" should be URL-encoded so that dangerous characters in each parameter value are replaced with "safe" character sequences. The server will understand these sequences and convert them back to source characters when reading the parameters string.
If you add variables through the Formula wizard, variables are added withurlEncode()function for you. You should always use this function if you are using the variable or field in the parameter part of a URL, such as "www.b2b.com?param=" + urlEncode($field). You should not use this function when your field or variable is used in the main address part of the URL, such as "http://www ." + $company + ".com."
Action Button Permissions
Action buttons have admin-level permissions by default, and will operate independently of a user's permissions.
| Info | ||
|---|---|---|
| ||
|
...
- ?login=myLogin&password=myPassword," then "login" and "password" are URL parameters, with "myLogin" and "myPassword" being the parameter values.
To compose a URL where parameters occur after the main address and the URL uses fields from the current record, you could use a URL like "http://www.agiloft.com?login=" + urlEncode($myLogin) + "&password=" + urlEncode($myPassword).
Note Every web server detects parameters and their values in a URL string by locating "?," "&," and "=" characters. That means that a URL parameter value should not itself contain any of these characters, otherwise the web server cannot recognize the correct parameter value. To avoid this confusion, each parameter that uses a field variable with "$" should be URL-encoded so that offending characters in each parameter value are replaced with "safe" character sequences. The server understands these sequences and converts them back to source characters when reading the parameters string.
If you add variables through the Formula wizard, variables are added withurlEncode()function for you. Always use this function if you are using the field or variable in the parameter part of a URL, such as "www.b2b.com?param=" + urlEncode($field). Do not use this function when your field or variable is used in the main address part of the URL, such as "http://www ." + $company + ".com."
Action Button Permissions
Action buttons have admin-level permissions by default and operate independently of a user's permissions. This makes it important to control who has view access to an action button field,
...
as well as at what stage in the record workflow
...
the action button should appear. If a user can view the button, they can
...
execute it, with a few exceptions
...
. However, the action button itself cannot be edited, so it is not necessary to control edit permissions.
...
| Info | ||
|---|---|---|
| ||
|
Visibility Dependencies
...
|
...
|
View Permissions
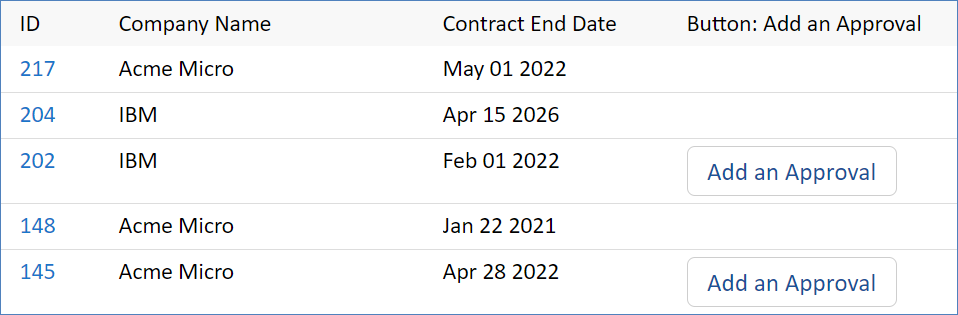
View permissions for action buttons apply to both the record form and the table view, but they have a caveat when placed on the table view. If users have permission to view an action button and it's placed on the table view, it will appear for every record, even if the user doesn't have permission to edit that record. If a user clicks an action button from the table view for a record they don't have permission to edit, the action won't run and the user will receive an error message.
You can change this behavior by setting the Always Show Action Button in Views global variable to No. This forces the system to evaluate users' permissions and only display action buttons on the table view for records that they also have permission to edit. However, this may impact system performance if you have many records or complex permissions.

The Permissions tab of the Action Button wizard contains a unique setting at the bottom, aside from the normal field permissions.

...
to view an action button and it's placed on the table view, it appears for every record, even if the user doesn't have permission to edit that record. If a user clicks an action button from the table view for a record they don't have permission to edit, the action doesn't run and the user receives an error message.
You can change this behavior by setting the Always Show Action Button in Views global variable to No. This forces the system to evaluate users' permissions and only display action buttons on the table view for records that they also have permission to edit. However, this may impact system performance if you have many records or complex permissions.
| Hide If | ||||||||||||||||||||
|---|---|---|---|---|---|---|---|---|---|---|---|---|---|---|---|---|---|---|---|---|
| ||||||||||||||||||||
Related articles
|