Contracts Table
The Contracts table holds all contract records. It also controls all associated automation and notifications related to contracts. A representative record is shown below.
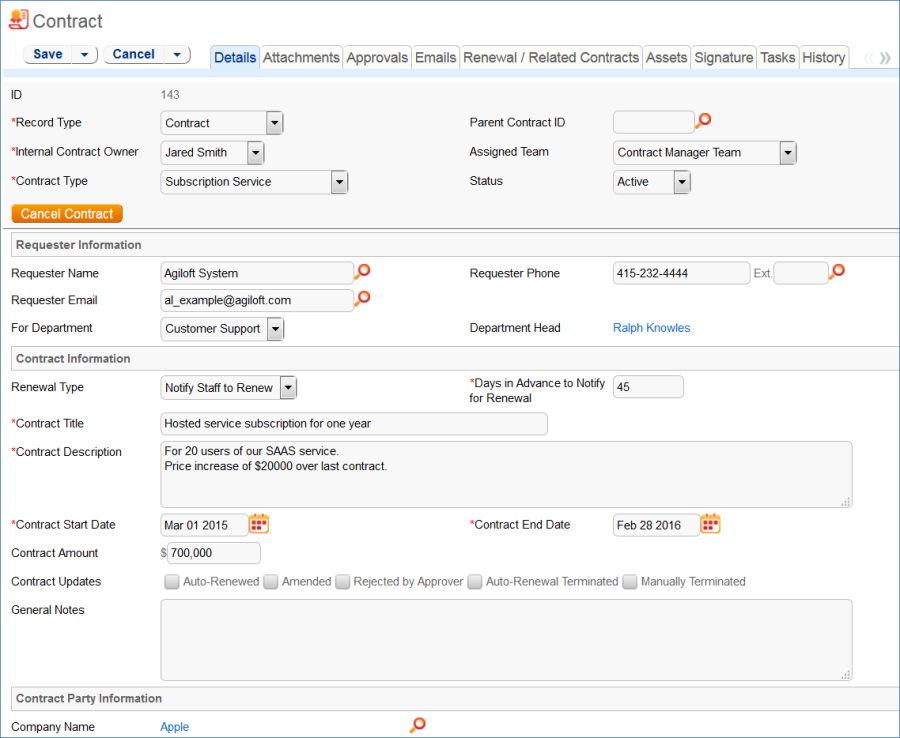
Required fields, marked with a red asterisk, are: Record Type, Internal Contract Owner, Contract Type, Days in Advance to Notify for Renewal, Contract Title, Contract Description, Contract Start Date, and Contract End Date.
Staff Use Case
This section covers the use case for staff members inside Agiloft. Each record in the table holds information about an individual contract including details about the contracting party, approval information, attached contract file and supporting documents, and renewal details.
Create Contracts
Contract records may be created by members of the Admin, Contract Creator, Contract Manager, and Contract Owner groups. Contracts may be created in one of two ways:
- Click New in the Contract table action bar
- Use the Create Related Contract button on the Renewal / Related Contracts tab to create a renewal, subcontract, or amendment from the current contract. This button is available only if the contract is in a Status of Signed, Active, Expired, or Canceled. Creating a new contract with the Create Related Contract button will automatically link it to the current contract by populating the Parent Contract ID field in the newly created record. For a more detailed explanation of creation by this method, see the Handling Related Contracts and Renewals section.
Contracts fall into one of four categories:
- Contracts
- Master Agreements
- Subcontracts
- Amendments
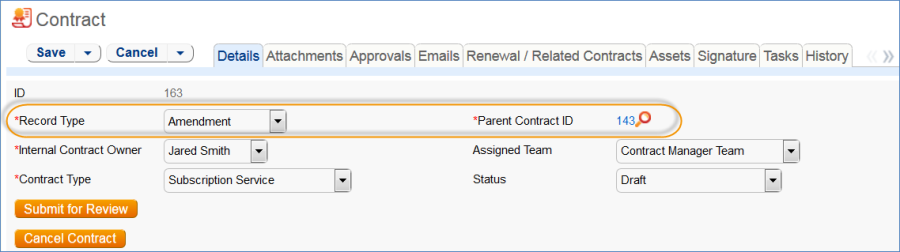
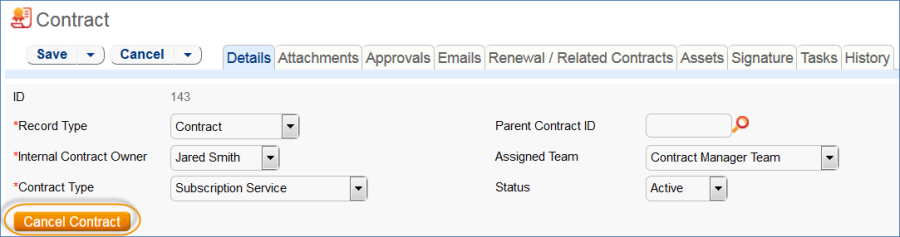
The Record Type field in the common area indicates the contract's category. "Contract" is the default Record Type for newly created contracts. It can be used to indicate either a stand-alone contract or a contract that exists under a master agreement. In the latter case, the Parent Contract ID can be filled in upon creation of the contract. Subcontracts and Amendments will be linked to a parent contract automatically, if they are created by clicking the Create Related Contract button in the parent contract record.
Below the Record Type are fields storing the Assigned Team and the Internal Contract Owner. The default Assigned Team is the Contract Manager Team. The Internal Contract Owner is the person responsible for overseeing the contract and ensuring timely renewals and approvals. The list of available owners is filtered to users who are in the Contract Owner Team or the Contract Manager Team. The default Internal Contract Owner is the user who creates the contract record, provided that user is in the Contract Manager or Contract Owner Team. Users in the Contract Manager or Admin group can manually change the Assigned Team and Internal Contract Owner if needed.

Once the appropriate fields are filled in, the contract may be saved in a Status of Draft.
The contract's Status field is changed automatically by the system at appropriate points in the workflow, generally when an action button is pressed or when some condition is met; however, users in the Admin group can manually override the Status if necessary.
Information about the contract requester, external company involved, and locations related to the contract may be added by clicking the lookup icon next to those fields. If a desired Requester, Company, or Location does not exist, a record must first be created in order to link it to the Contract.
Creating companies and contacts during contract creation
In the Contract Party Information section, users can find and link to an existing company, or create new ones as needed. To find an existing company record, use the lookup icon to search for the company. If the contract party isn't found, staff users can add a new company by selecting New Company. Enter the name and address information, then click Create Company.
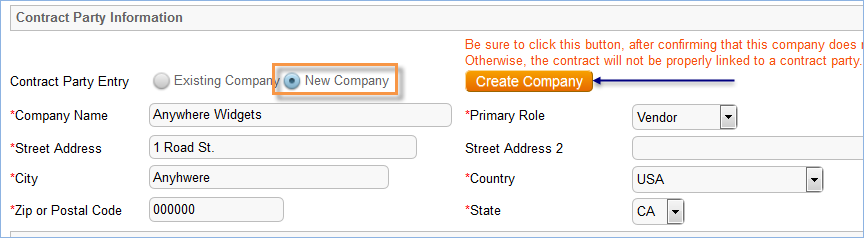
Both company and location records are created in the background, and linked to the new contract when the record refreshes.
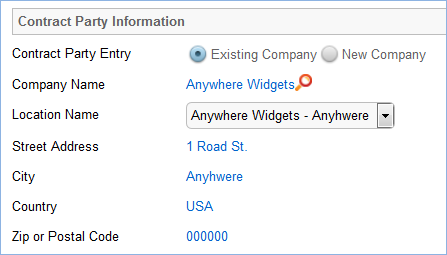
Similarly, you can create new entries in the people table if the main contact for the contract party is not an existing contact. Select New Contact, enter the information, and click Create Main Contact. Multiple contacts can be created in this way, and then the primary contact can be selected from the Main Contact drop-down.

When Contract Requesters submit a new contract through the end user interface, they can enter new company and contact information, but they don't see the buttons to create new records. When a contract is submitted for review, Contract Managers can edit the contract party information, or click the button to confirm the new company or contact and finish adding records.
This setup is intended to prevent end users from creating duplicate companies with slightly different spellings and to ensure that contract managers have ownership and control of this data. Permissions can be changed easily to allow end users to use the buttons to create companies and contacts directly. Note that it is important for the contract managers to evaluate the new additions and either replace with existing data or click the buttons to create the appropriate background data. Otherwise, the linked data can't be used in print templates and emails.
Creating contract attachments from default print templates
The Attachments tab shows all attached files related to the contract and provides the user with options to create and edit related attachments. For certain contract types, when the Document Source is set to Standard Template or Modified Template, the Print Template to Generate field appears. The Document Source can also be set to 3rd Party or Internal – Other to indicate a document provided by the external contract party, or which has been internally generated but not from a template, respectively. The Print Template to Generate has a default value set based on the contract type. The Create and Attach action button is used to auto-generate a contract document from the MS Word print template specified in the Print Template to Generate field and stored in the Print Template File field. Clicking Create and Attach generates the document and creates an attachment record to hold the attached file. It also increments the Version Number field.
If the Contract Party Information section is not properly filled out and linked to records, a validation action warns the user to finish creating new records before generating the attachment.
Creating contracts and attachments from inbound emails
Attachments can be automatically generated from inbound emails containing attached files. Files from inbound emails are mapped to the Transitional Contract Files field in the contract, assigned a predetermined Attachment Title and Attachment Type value, and then converted into a new attachment record. The file is mapped into the Attached File field in the attachment record. If multiple files are attached to an inbound email, each one is converted into a separate attachment record for that contract.

Working with Attachments
The All Contract Attachments related table is also used to manually create and attach files to the contract, such as performance bonds, signed agreements, or other documents from the contract parties. Create attachments from within the contract record by clicking New on the related table's action bar.
The Select Files > Add/Remove from DS Envelope actions on the action bar can be used to add or remove selected attachments to and from the DocuSign envelope when using DocuSign integration. When these actions are selected, the To Be eSigned field is set to Yes or No, and the DS Files to Sign field on the DocuSign tab is updated with the attachments. The Select Files > Supersede File action sets the Status of the selected file to Superseded.

Tracking insurance certificates
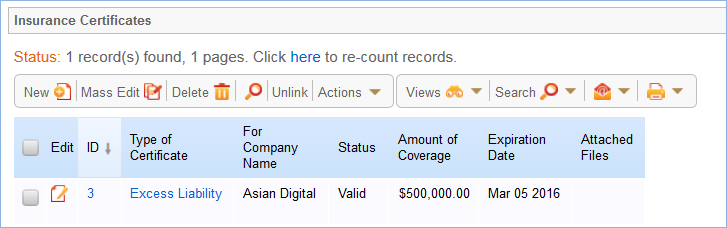
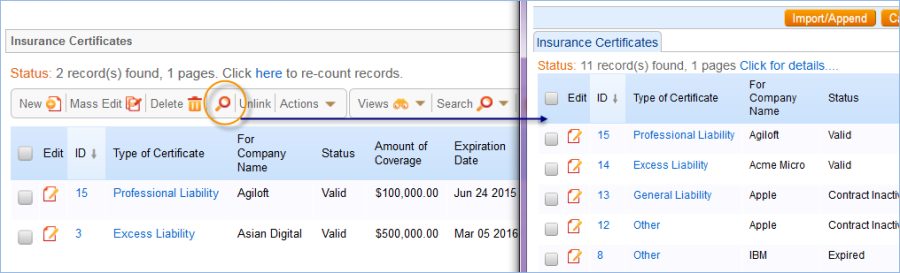
The Attachments tab also holds a related table that can be used to track insurance certificates separately from other types of attachments. Certificates can be found directly in the Insurance Certificates table, and in related tables in both the Company and Contracts tables.
When you add an insurance certificate to a company record, it is automatically linked to all pending or active contracts with that vendor by a daily time-based rule (disabled by default).
To create a certificate from a contract record, click New on the related table action bar; the certificate will be automatically linked to the contract. You will need to look up the company vendor in the For Company Name field when creating certificates from a contract.
The Insurance Certificate Owner (defined in the company record) is notified fourteen days before an insurance certificate's Expiration Date. When a certificate expires without being renewed, the Contract Managers of any related active contracts are notified on the date of the expiration.
For more information about insurance certificates and related automation, see the Insurance Certificates Table section.
Another method for managing insurance certificates
You may prefer to manage insurance certificates as contract attachments, instead of using the Insurance Certificates table. For example, if Contract Managers are responsible for renewing and maintaining insurance certificates, it may be best to use the Attachments table to hold the certificates, along with all other types of attached documents for contracts. Managing insurance certificates as contract attachments means the Contract Manager will receive email notifications instead of the Internal Certificate Owner.
If this method makes the most sense for your particular business, you can remove the default Insurance Certificates field from the contract layout. Then, go to the Attachment Type table and edit the record called Insurance Certificate. By default, this record's Status is Inactive; change the Status to Active to make it visible in the Attachments table.
Adding notes and sending emails
Notes relevant to the general contract process are entered into the General Notes field on the Details tab, and notes pertaining to the approval process are entered into the Approval Notes field on the Approvals tab.
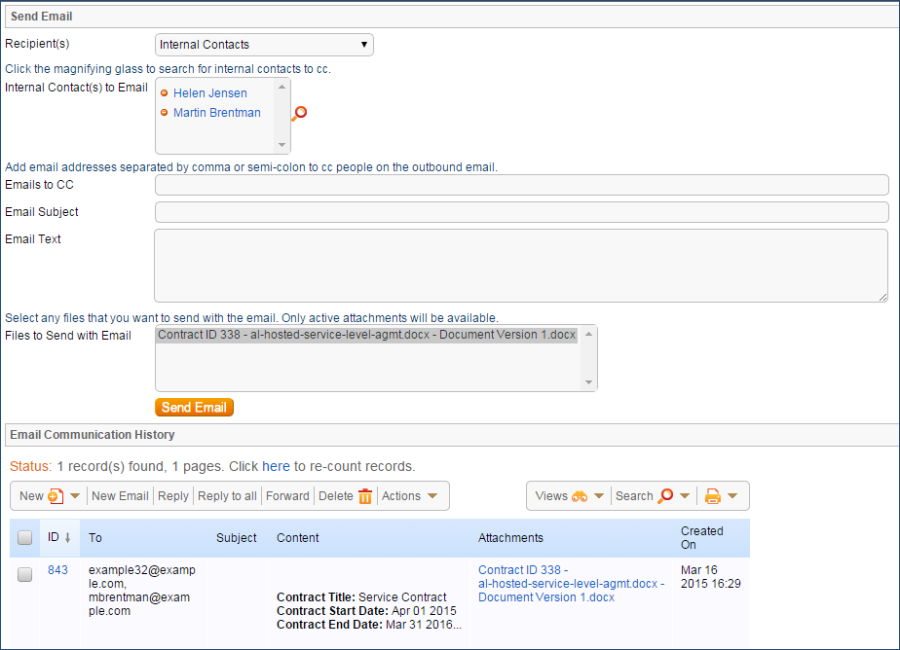
Emails can be sent to Internal Contacts and External Party Contacts from the Emails tab. First choose the type of Recipient(s) (Internal Contacts, External Party Contacts, or External Party and Internal Contacts), then click the lookup icon to select which contacts to email. Fill out the Email Subject and Email Text fields as needed, select any files to send with the email, then click Send Email.
Renewals and previous contracts
Information about the renewal process is stored on the Renewal / Related Contracts tab. Fields for capturing the Renewal Notification Date and Days in Advance to Notify for Renewal are provided as a default. If relevant, information about the renewal contract or previous contract are automatically updated by the system. Users typically do not manually link contracts.
Related assets
Assets can be linked to individual contracts from the Assets tab. Assets must be added separately to the Assets table before they are available to attach to contracts.
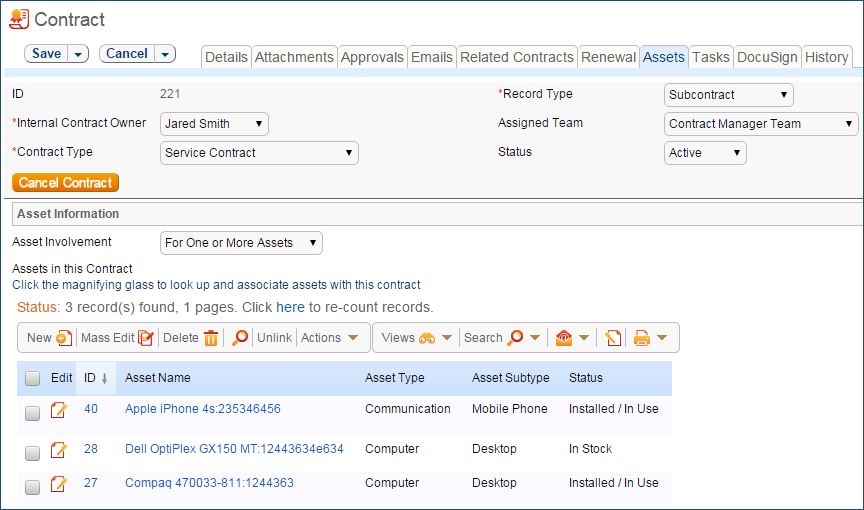
Depending on the selection in the Asset Involvement field, different fields appear for the user to input linked assets.
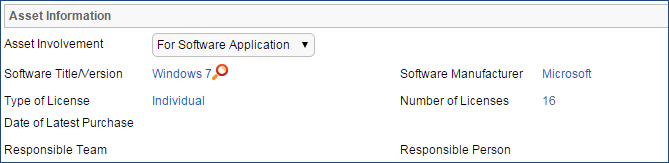
For hardware assets, select "For One or More Assets". For software assets, choose "For Software Application". For contracts with no linked assets, use "No Assets" from the Asset Involvement drop-down.
Signing contracts with DocuSign
A Signature tab appears to the right of the Assets tab. This tab contains fields for contract document Signers, and contains all fields related to DocuSign. The DS Files to Sign field holds attached files from the Attachments table that have a To Be eSigned value of Yes. The Refresh Files action button refreshes this field in case changes to the attachments were made in the same session under the contract's Attachments tab.
Fields under the Signers heading are used to populate the signature page of the contract's print templates and to add DocuSign tags if the contract uses DocuSign.
Once the contract is ready to sign, use the Create DocuSign Envelope action button to create a DocuSign Envelope record and attach the files held in the DS Files to Sign field. It also creates a DocuSign Recipient record for each signer. These records are then shown in the related tables for DocuSign Envelopes and DocuSign Recipients on the Signature tab. Only users in the Admin and DocuSign Users groups can access the DocuSign fields on the Signature tab. For more information on DocuSign, refer to the Error! Reference source not found. section and the detailed DocuSign User Manual at http://www.agiloft.com/documentation/docusign-users-manual.pdf.

Handling Approvals
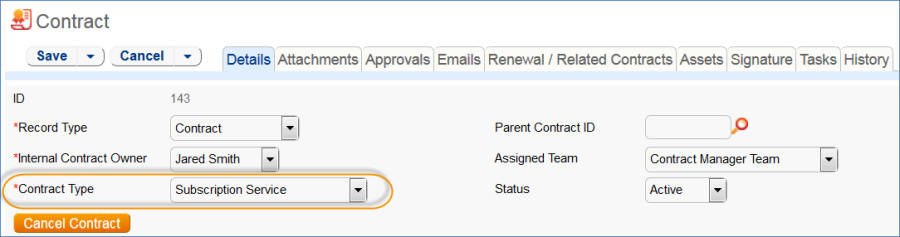
The order and nature of approvals depends on the Workflow Title selected on the Approvals tab. Selecting a Contract Type in the common area filters the available Workflow Title choices. For information on setting up the individual Workflows, refer to the Approval Workflows Table.
The order and nature of approvals depends on the Workflow Title selected on the Approvals tab. Selecting a Contract Type in the common area filters the available Workflow Title choices. For information on setting up the individual Workflows, refer to the Approvals Table section.
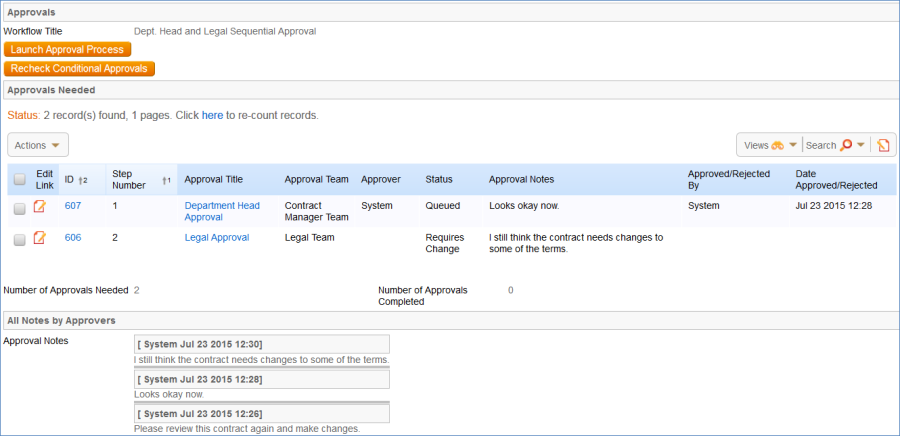
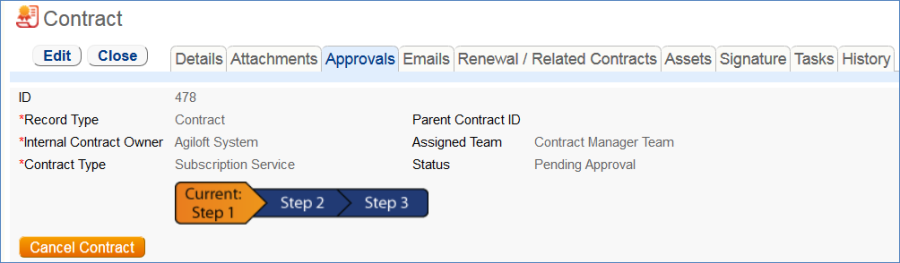
To submit a contract for approval, first select the correct Workflow Title from the drop-down provided. Click Create Approvals to generate a set of Approval records in a Status of Queued. Once the records have been created, click Launch Approval Process to update the Status of the contract to Pending Approval and update the Status of the approval(s) with the lowest step number to Pending Approval. There may be more than one approval in the lowest step number for parallel approvals.

The system automatically notifies the first approver in the sequence. A progress bar also appears in the common area to provide a quick visual reference of the approval process.
To advance the contract workflow, an approver will use one of three action buttons to change the Status of the approval record:
- Approve to send the contract to the next approver in the sequence.
- Require Changes to send the contract to the previous approver for changes.
- Permanently Reject if the contract requires significant changes.

Both Require Changes and Permanently Reject require the user to enter notes in the Approval Notes field. These notes are appended to the Approval Notes field in the contract record and are also viewable from any other approval record linked to that contract.
As each approval is approved, the system notifies the next approver in the sequence that a contract is pending their approval. A list of all approval records is displayed under the Approvals Needed subsection and automatically updated as approval records are modified.
If a user who is not on the current approval team attempts to approve a contract, the system recognizes the error and prevents the user from completing the approval action.
When all the required approvals are received by the system, the contract Status is automatically changed to Approved.
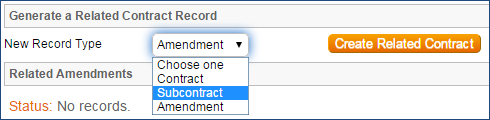
Handling Related Contracts and Renewals
Related contracts are handled in the Renewal / Related Contracts tab of a contract record. To create a related contract, select the New Record Type of the contract. The choices in the drop down are filtered by the Record Type of the originating contract. These fields are visible only when the contract's Status is Active, Canceled, Expired, or Signed. Clicking Create Related Contract maps relevant information from the current contract into the new one.
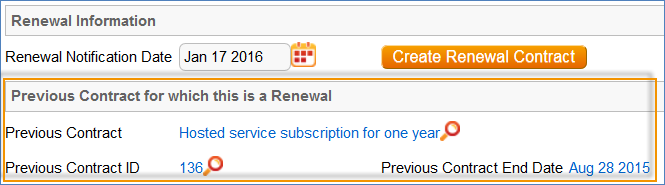
If the new contract is a renewal, click Create Renewal Contract on the Renewal / Related Contracts tab of the parent contract. This button is only visible when the contract's Status is Active, Canceled, Expired, or Signed. A new contract generated in this way can be edited before saving.
If applicable, the system automatically links renewal contracts to any preceding contracts, creating a chain for auditability. Any assets linked to the preceding contract will be linked to the renewal contract as well. This information and related information on the contract process for renewals are stored in the Renewal / Related Contracts tab. Users typically do not enter information into the Renewal Contract and Previous Contract Information fields manually.
Contract Processing
This section covers the remaining Status changes not mentioned in the explanations above. Once a contract changes to a Status of Signed, the system automatically updates the contract to a Status of Active when the Contract Start Date occurs.
Similarly, the Status is changed when the Contract End Date occurs. If the contract does not have an associated renewal contract, the Status is automatically set to Expired; if the contract does have a renewal, the Status is set to Renewed. If the contract is auto-renewing, the Contract End Date is increased by the Renewal Term in Months and the contract remains Active.
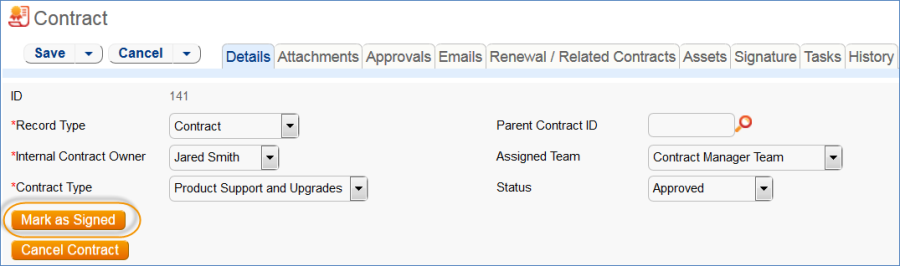
To cancel a contract, click the Cancel Contract button in the common area. Additionally, users of the Admin group can manually change the contract status to Canceled.
If the contract has a Status of Approved, the Mark as Signed button is visible in the common area. This button updates the contract Status to Signed.
Turning Off Approvals
Contract Management tables have Approval handling set up by default. The associated processes may be turned off in order to use Agiloft as a contract repository. To turn off Approvals, do the following:
- Edit field permissions to allow the Contract Manager Group to edit the Contract Status field in their own contracts and in others' contracts.
- Remove status-changing buttons from the layout: Submit for Approval and Mark as Signed.
- Remove the Approval tab and related fields from the layout.
For help on configuring table layouts, please refer to the Administrator Reference Manual or online help.
End User Use Case
This section covers the use case for end users in a Contract Management context.
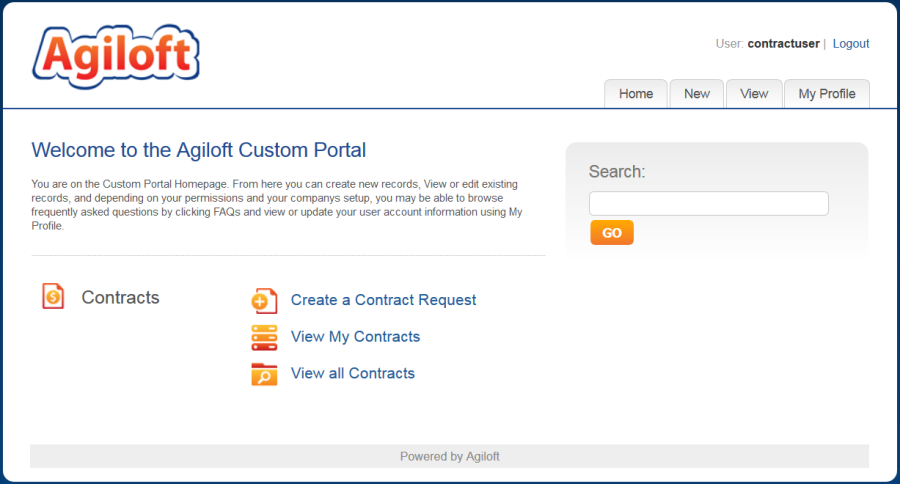
Members of the Contract Creator group are internal employees accessing the system via the end user interface. Contract creators, also called contract requesters, are users who submit requests for contracts but do not work on other users' records. Below is a representative home page for an end user in the Contract Creator group.
Creating Contracts
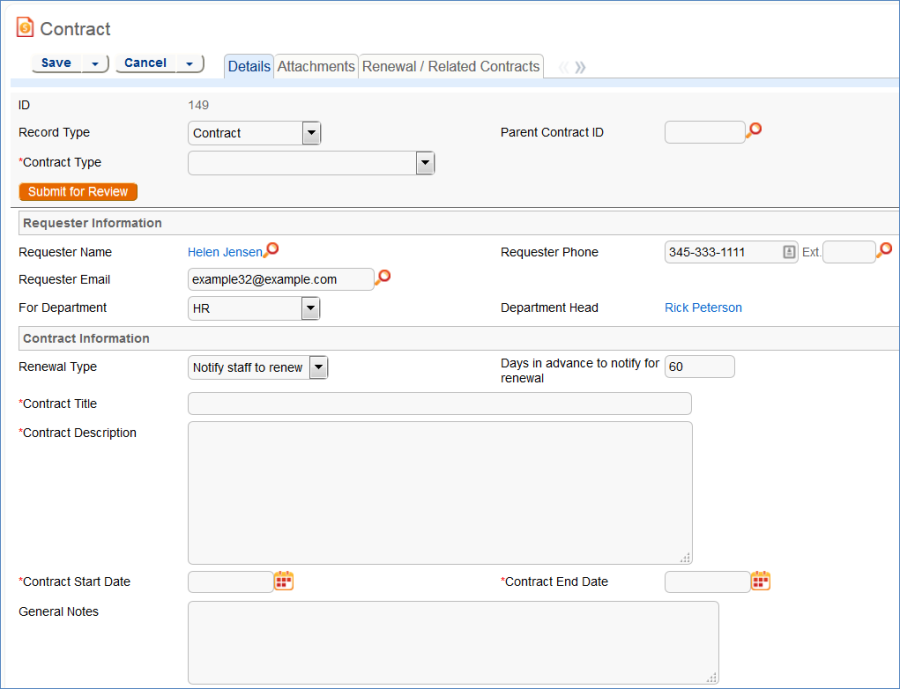
Users in the Contract Creator group may create contracts by clicking the Submit a Contract link or tab on the home page. A simplified contract form is presented to the end user. Many of the fields are hidden from the layout or restricted by field-level permissions.
In the Contract Party Information section, users can find and link to an existing company and contact, or create new ones as needed. Select New Company and then enter the name and address information. After the contract is submitted for review, Contract Managers can confirm the new company to finish adding a record. Similarly, end users can suggest a new company contact by filling out the fields in the Party Main Contact section of the form.

Once the required information is filled in, the contract can be saved for later revisions. The contract requester can also press the Submit for Review button to request approval from a Contract Manager. Contract requesters can be contacted to update the submitted contract, but they are typically no longer involved in the approval process from this point forward. After the contract requester submits the contract for review, a contract manager decides whether to continue with the approval process or reject the contract request.
Working with Contracts
At any time, the contract requester can view contracts they previously submitted by clicking the My Contracts tab. Contract Creator group members can edit select fields in contracts they own. Certain fields such as Contract Amount, Contract Start Date, and Contract End Date (among others) are not editable by the contract requester if the contract's Status is Pending Approval, Approved, Signed, Active, Renewed, or Expired. This is to prevent changes to currently active or in process contracts.
The contract requester can view all contracts they have permission to see by clicking on the All Contracts home page link or tab.
Ownership of Contracts
Records in this table are owned by the Contract Requester. Specifically, a record is owned by the user whose ID matches the number in the Requester ID field. By default, the Contract Requester is the user who created the contract record.
Automation
The Contracts table has several rules set up. Their actions have been described in the use cases above. Rules which are run based on a schedule (rather than those which are event-triggered) are identified by the prefix "TB", for time-based.
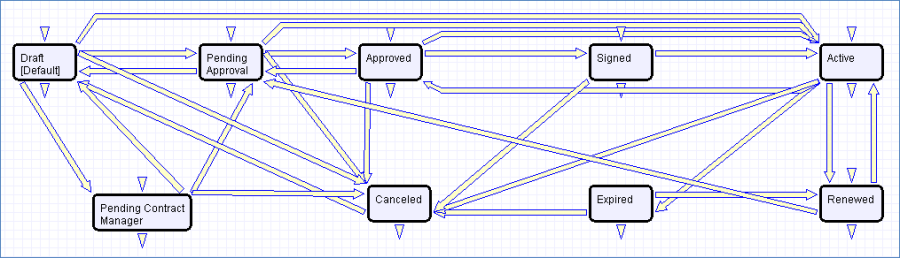
Workflow
The Contracts table has the following default workflow:
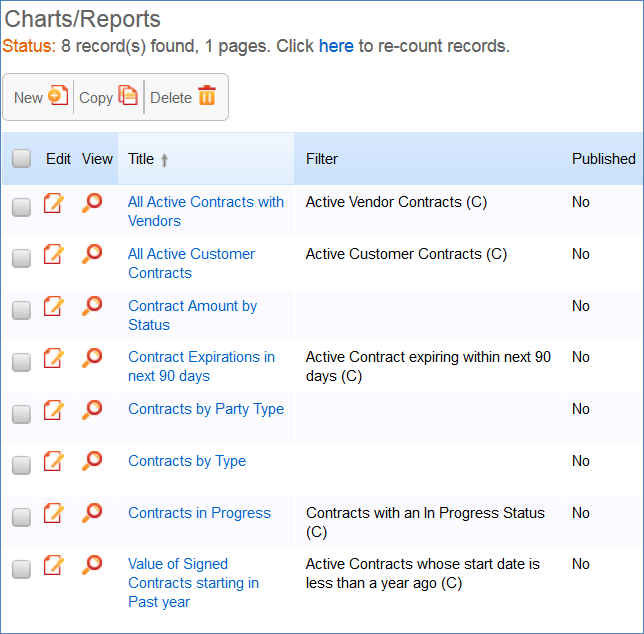
Reports
The Contracts table contains the following default Charts/Reports: