...
The Details tab contains most of the basic information for an Incident including the submitter, service and service problem, priority, description, files, and related CIs.

| Anchor | ||||
|---|---|---|---|---|
|
The submitter fields, Submitter Name, Preferred Notification Method, Phone, Department, and Service Level in the Submitter Information section default to the person who creates the incident, but this can be changed by clicking the lookup icon.

| Anchor | ||||
|---|---|---|---|---|
|
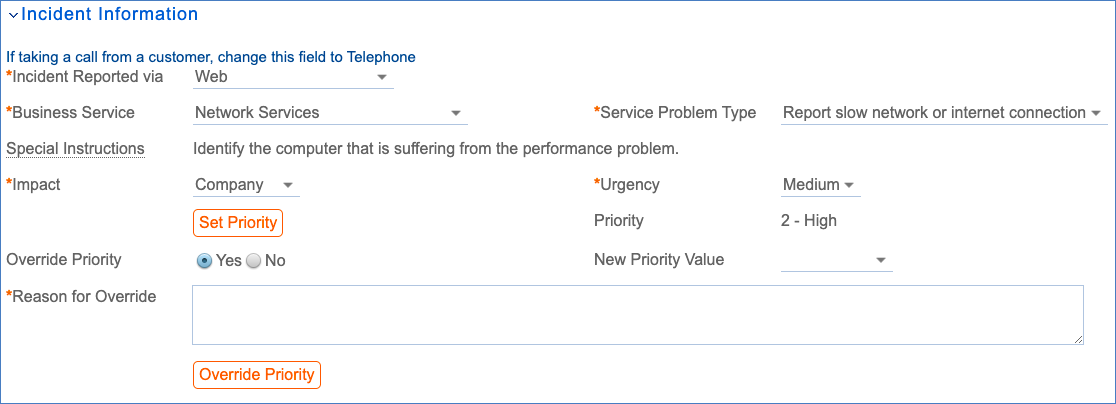
The Incident Information section contains an overview of the incident itself. Incident Reported via can be used to indicate how the incident was submitted, with options of Web, Telephone, E-mail, Voicemail, and Event Monitoring System. Next, a Business Service must be selected. Depending on the Business Service chosen, certain Service Problem Types are available to categorize the incident further. Impact indicates the scope of the incident's effect, and Urgency can be used to convey how important it is to resolve the issue. Impact and Urgency have options that are available based on the Priority Group for the Service Problem Type selected. Once Impact and Urgency values are selected, the Set Priority button can be clicked to view the priority that will be automatically assigned when the record is saved. If this automatically-generated Priority needs to be manually overwritten, Override Priority can be set to Yes, a new Priority can be selected, and a Reason for Override must be entered before clicking the Override Priority button.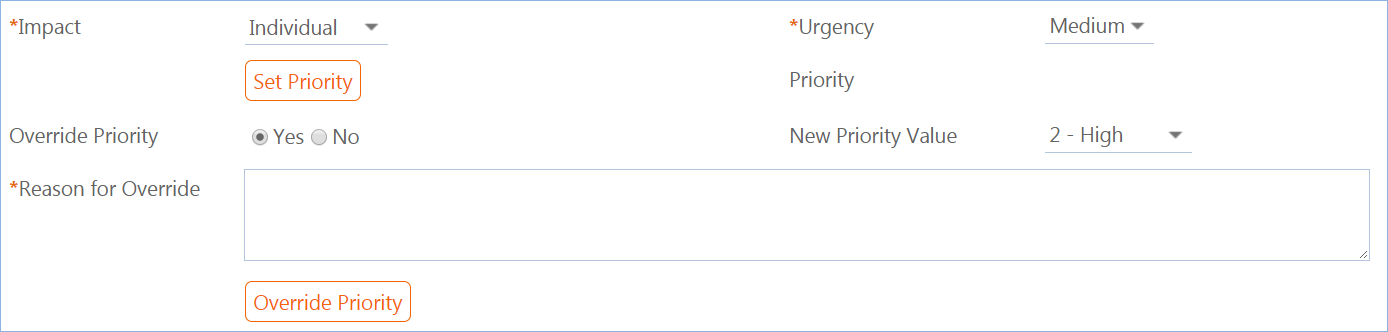
The Description field allows for a more detailed explanation of the incident.
...
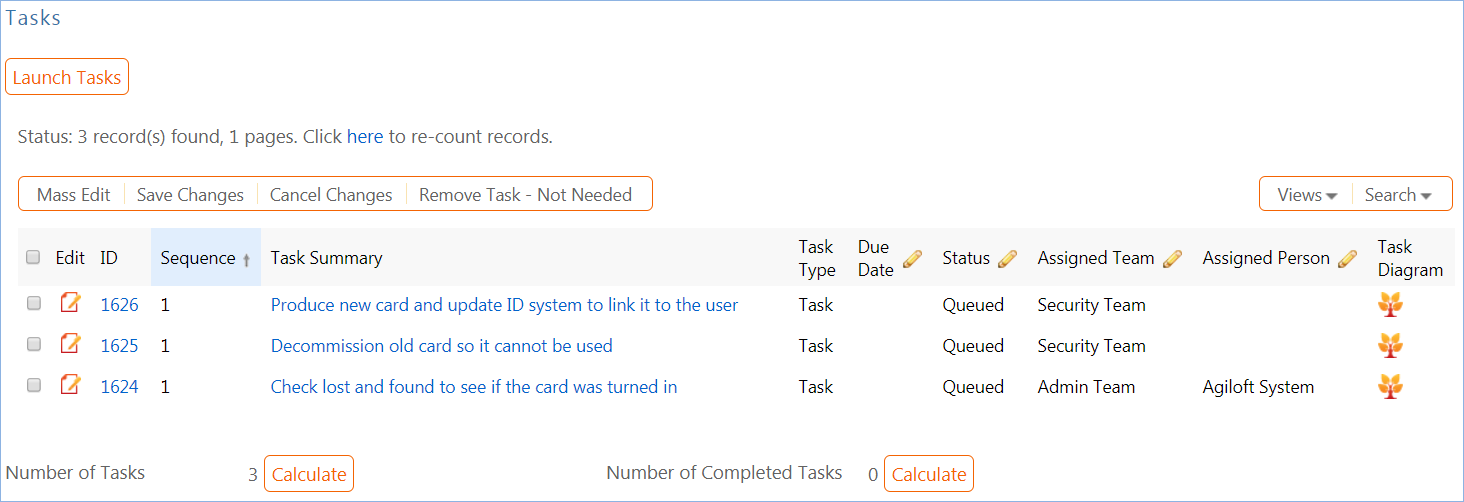
For instance, an incident with the Business Service of 'Facilities Maintenance and Security' and Service Problem Type of 'Lost Keycard' automatically shows three checkboxes representing tasks that can be selected and generated for an incident.


To use one or more of these tasks for this incident.., follow the steps below.
- Select the task(s) checkbox and click Generate Tasks. The tasks will be generated and shown in the Tasks related table.
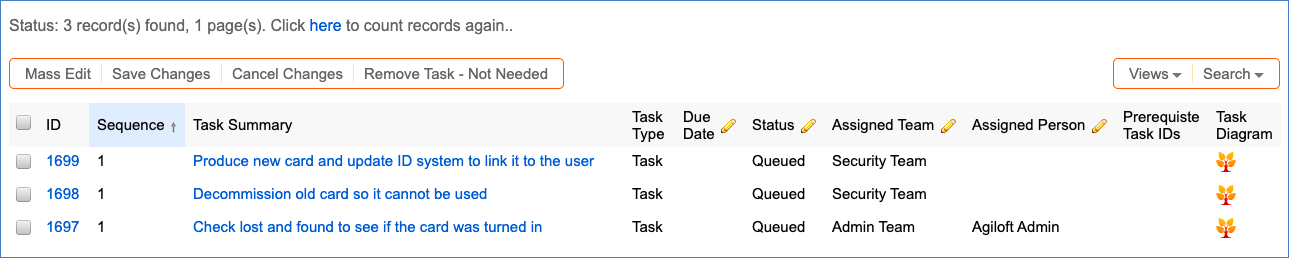
- By default, these user-selected tasks are not sequenced and can be completed in any order. It is usually better to create a task workflow if you want a sequential process. However, you can also take the un-ordered unordered tasks and modify them to identify prerequisites. To indicate that the task has prerequisites, edit it and navigate to the Related Tasks tab.
- Set 'Enable Prerequisite Tasks' to Yes to show the fields used to create task prerequisites.

- Next, select the task that should precede this one from the Add Task to Prerequisites drop-down and then click Add to Prerequisites. If there will be more than one task in the sequence number before this task, you can use the Trigger Condition field to specify whether this task should be launched when all of the tasks for the previous sequence number are complete or if any one of them is complete.
- The prerequisite task will then be shown in the Prerequisite Tasks table and the Number of Prerequisite Tasks will be incremented.
- Save the task. Once saved, the task's Sequence number will be automatically updated to reflect its new position in the task workflow.
- The task chosen as a prerequisite will also be updated to show the tasks that are dependent on it.
- Set 'Enable Prerequisite Tasks' to Yes to show the fields used to create task prerequisites.
...