...
| Anchor | ||||
|---|---|---|---|---|
|
...
The system comes with over 100 preconfigured time based rules that can run on any frequency, from every 5 minutes to every 10 years. These rules identify service requests or incidents that have gone past their SLA due dates, tasks that are coming due, and much more.
| Info |
|---|
| Since there are many parts of the system that a given customer may not use, we have disabled all these time based rules by default. As you configure each module of the program to go live, you will need to enable the rules that you want to use. |
This is easily done from the table setup menu by going to You can easily enable rules by navigating to Setup [Table] and then visiting the Rules tab. For instance, suppose you want to turn on time based rules for Business Services. Under the Business Services table in the left pane, click :
- Click Setup Business Services.
...
...
- Navigate to the Rules tab.
...
- Sort the Rules by the Comment field to find the time-based rules that have a z in front of their name
...
- . This indicates that they have been disabled
...
- .
...
- Select each rule you want to
...
- start running and then click
...
- Enable.

...
- Edit each rule that you enabled. Change the name of the rule to remove the "zdisabled" text.
You text - you can also enable each one while editing the name by scrolling to the bottom of the first screen and setting rule is enabled to Yes, then saving the rule. a rule by editing it, scrolling down to the "Rule is enabled" option, and selecting Yes.
Security Controls
In general, group permissions control what each user can see and do in the system. A user may belong to more than one group to receive a superset of that group's permissions. For detailed documentation of our group permissions and how they work, click Group Permissions Help.
Designating Fields as Mandatory
| Anchor | ||||
|---|---|---|---|---|
|
Yes, any Any field may can be made mandatory. It can be defined as always required, never required, or conditionally required based on the value in another choice-based field. This option appears within the field setup wizard, on the Options tab.


Once fields have been designated as required, how this requirement is displayed is defined globally.
The Required Fields window, located at the Setup gear icon > Look and Feel > Required Fields Display, is a single page that allows you to define how the system displays required fields.
The options selected in the Required Fields window apply to all users, and can be defined separately for User-record fields and for Wizard fields.
...


| Anchor | ||||
|---|---|---|---|---|
|
...
Saved searches let you run the same search repeatedly and are typically used for searches you will need routinely. Saved searches have the added benefit of accepting more complex search criteria and offer more granular search results.
Quick Searches
Quick searches are done from the search block above the table you wish to search. If the search block (screenshot below) is not visible, click Search on the action bar to expand the search block.

Using the Search Block
- The first input box is a drop-down to indicate which field in the table to search. If the default -TEXT- is selected, all fields will be searched, including the content within any attached files, including .doc, .docx, text, and CSV files as well as OCR'd PDF files.
- The second input box defines the search operator. Different operators are available depending on the type of field selected in the first box. For example, numeric or choice fields offer “greater than” and “less than” operators, but text fields do not.
- In the third input box, enter the value you are searching for.
You can perform searches in two different ways. The first way is to use the search bar at the top of the main window. This allows you to search for general text throughout the entire system or in an individual table of your choice. You can select where you'd like the search to apply using the drop-down list to the right of the search input bar.
![]()
You can also use the more robust Quick Search feature to filter your searches using more than just text, although there is a more robust text search feature available in Quick Search. The Quick Search feature appears on the far right-hand side of the window after you click Search from the action bar. You can use the text search feature at the top of the pane to search by String, Context, or Synonyms. You can also click Active Only to ensure only active records are included in the search results. 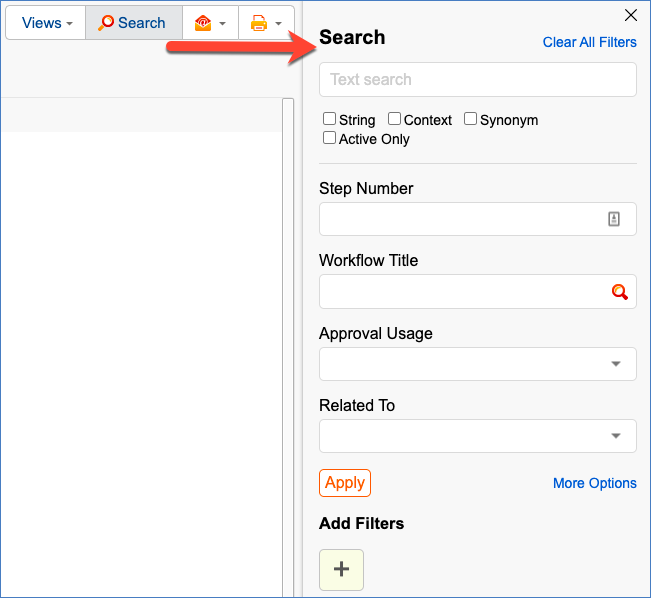
While the Text search options remain constant, the other options on the Search pane are determined by the columns in the Default table view. For example, the options available in the Search pane above correlate to the columns in the Default view of the Approval Templates table.

You can also filter your searches using specific Fields. Under Add Filters, click the + icon. You can then add filters that will find records that contain fields with values that match the parameters you input.
 The most common ad hoc searches will look something like “Knowledge Type equals User Guide" or “Incident Summary contains keycard.” Quick searches can be performed on related tables using the search function on the associated action bar.
Saved Searches
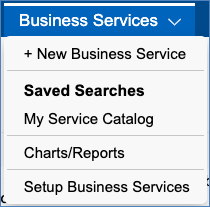
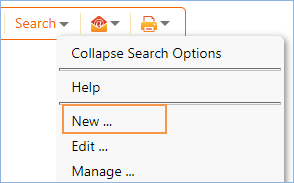
To create a saved search, hover over the down arrow next to the search item in the action bar and select New.
:
- Access the table you'd like to create the search in.
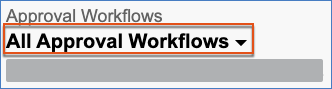
- Click the Search Name underneath the table name. The default search name is usually stylized like "All [Table Name]" or something similar.
- From the drop-down list that appears, click New. This opens the saved search wizard, which has options for Simple filters (most commonly used), as well as more advanced options.
- Click Simple to add a filter.
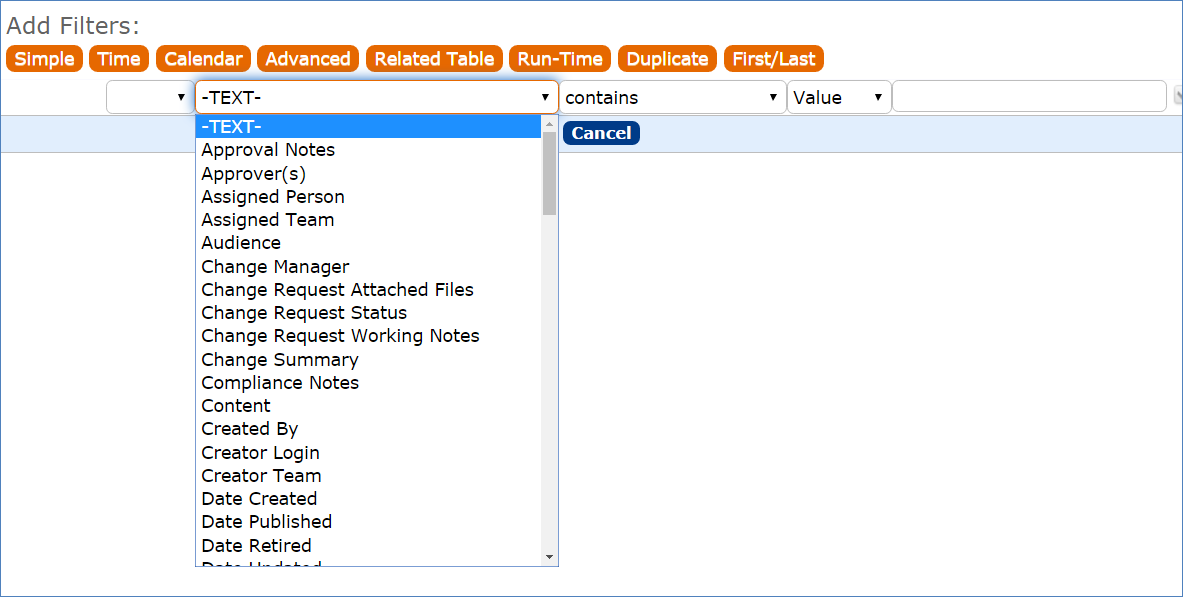

Similar to Just like the quick search above, simple filters let you search any field for a particular value. Again, selecting Selecting -TEXT- will search through all available fields within the current table. For more information on the other search types, please see Saved Searches or the online training unit for searching.
...
Users in the Admin group, and those with permission to publish saved searches, see have access to an Apply tab in the saved search wizard where they can decide which groups should have the search:
- Accessible
- Active
- Visible in
...
- top nav bar
- Visible in My Assigned
The Apply tab options have the following results:
- Choosing to make a search Accessible gives user the ability to interact with the search in their own Manage Searches wizard.
Each staff, or power user , can adjust where their accessible searches appear by checking the Active, Show in Left Pane, or Show in My Assigned boxes, defined next. This lets users customize where searches appear to tailor the interface to their work preferences.
- Active makes the search appear on the Search drop-down.
- Show in Left Paneadds the search to the left pane, indented below the Table name.
- Show in My Assigned adds the search to the My Assignedsection in the left pane.
| Anchor | ||||
|---|---|---|---|---|
|
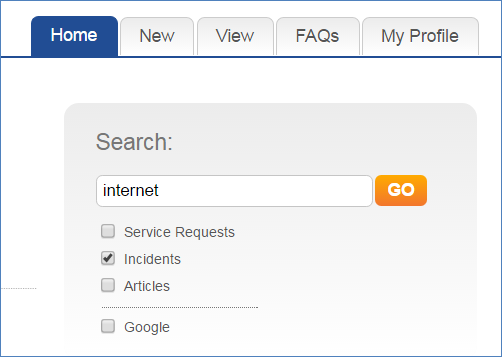
In the end user interface End User Interface home page, there is a search block that can be used to search tables to which the user has access. A general internal customer can search service requestsService Requests, incidentsIncidents, articlesArticles, or can use an integrated search from Google.