...
The Change Request table pulls its services from linked entries in the Services table. A user creating a change request chooses the category of service from a drop-down, and then sees all the active services that belong to that category in a second drop-down list called Service Title. The default service categories for change requests can be seen in the Assets table or by creating a CR record and opening the drop-down list. When the service is selected, several additional fields are pulled in with the service, including fields defining whether approvals are needed and the approval generation type.

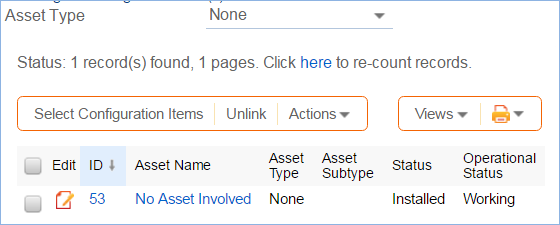
Once the main fields are filled in, the user navigates to the Assets tab. This allows the user to look up several assets. The assets can be filtered by first choosing an Asset Type and then clicking the Select Assets lookup.


Note that if no assets are involved in the change request, you are still required to select one because of the way tasks are managed in change requests. Use the No Asset Involved asset record with the Asset Type of None in this situation. This allows all task generation and other functionality to work as expected.

Once the assets have been selected, to further process the change request, the user needs to click the Submit for Review button:
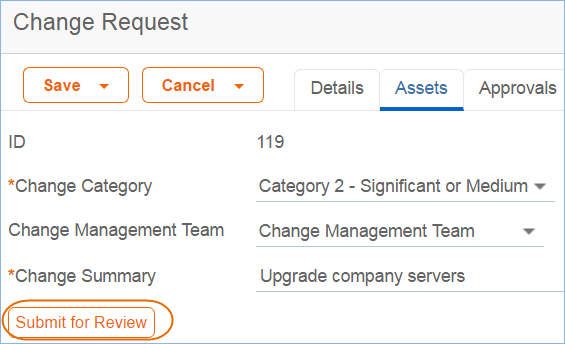

This saves the change request, validates the required fields, sets some background fields that control visibility of the approval and task buttons, and sets the status to Pending Change Manager.
...
Once the request has been sent for review, if it was for a service that requires approvals, the change manager can review it and generate any needed approvals:
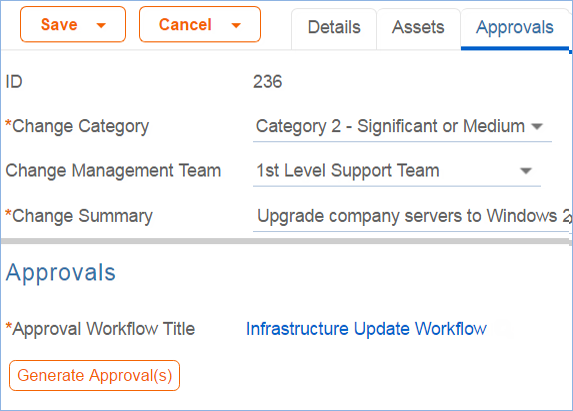
approvals with the Create Approvals button.

Clicking Create Approvals generates Clicking the Generate Approval(s) button will generate the approvals based on the predefined approval workflow. If the change request service allows ad hoc approvals, options will be are available to generate additional approvals as needed. Approvals are generated in a Status of Queued by default. Once the approvals are generated, new buttons appear:called Launch Approval Process and Recheck Conditional Approvals appear under Approval Workflow Title.

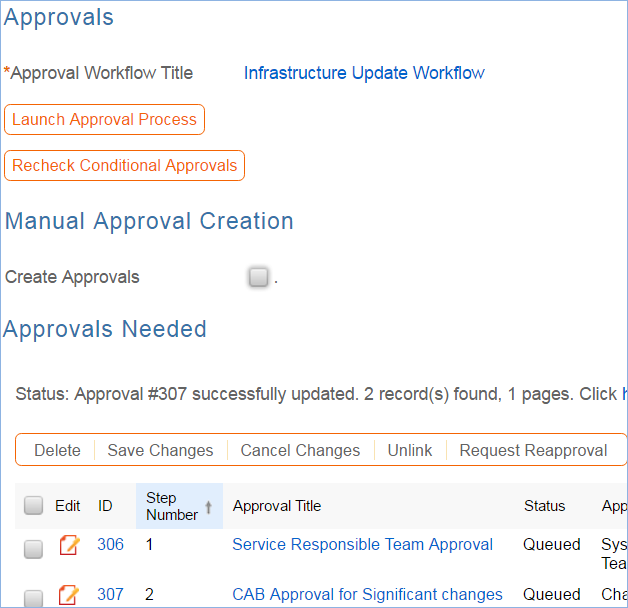
When the change manager is ready for the approval process to start, she clicks the Launch Approval Process button, which will set all approvals with the lowest step number to Pending Approval. It will also update the Status of the Change Request to Pending Approval:.

When an approval's status is set to Pending Approval, the approval team and/or Approver are notified by email.
...
Tasks can be created for the CR before the approvals are done. The only requirement is that the user must first enter the Change Window Start Time and Change Window End Time, as the End Time will be used as the Date Due for the tasks:


Depending on the task generation method, one or more tasks will be created for each selected asset. If the task generation method is CR Single Task from Template, then the a predefined template will be is shown:
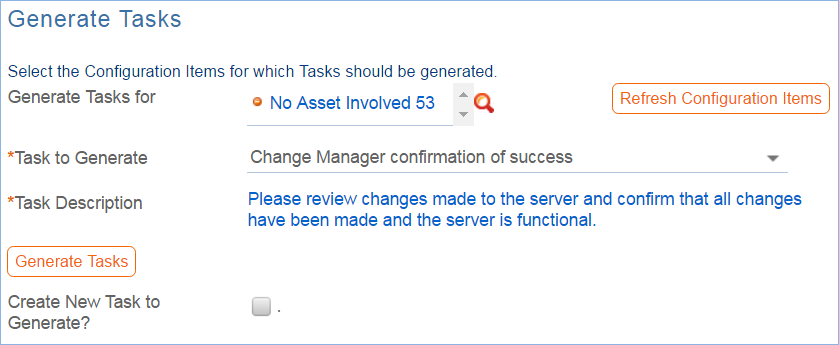

Here the default task template is the one called Upgrade Windows OS. Clicking the Generate Tasks button will generate one task for each of the selected assets.
The user may then select another task to generate when that is done, if desired. They may also check the box for Create New Task to Generate ? to create another task template that can be generated for all the selected assets. Checking that box will display fields to fill in for the ad hoc task:
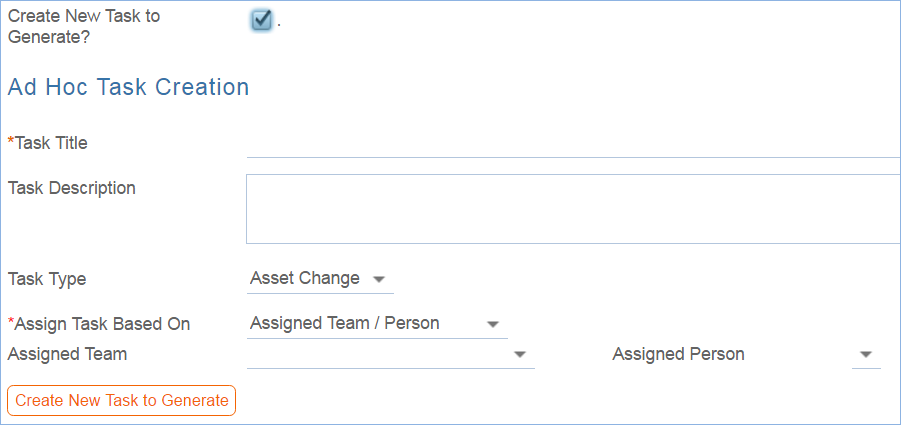

Clicking the button to Create New Task to Generate will create a new Task Template, save the change request, and reopen it to edit, with the new task selected in the Task to Generate field. From here, you can click the Generate Tasks button again to add the Task to this CR for each Asset that is selected.
...
During the working process, some tasks may be removed as not needed by the change manager. The action bar above the Tasks table in the change request includes a button to remove one or more tasks:


This changes the status of the selected tasks to Not Needed and they move into the Inactive Tasks table shown on the Inactive Tasks tab:


From this area, if it turns out that the task actually is needed, the change manager can select one or more tasks and click the Reassign Task to set their status to Assigned and move them back into the active Tasks table.
...
Technician users may easily report the time they spend on handling change requests. There are two fields and an action button: Time Spent, Time Description, and Add Time on the Work Notes Time tab of the layout.

Entering values there will automatically create a new time entry record when the Add Time button is clicked. The time entry will show the work done by the technician and on the current date.


All the time entries for a request can be seen on the Time tab as well. If a technician needs to report time that was spent on a different day or by a different user, they may click the New button on the Time spent table to submit a time entry directly and change the date or "Done byBy" field. All time entered is totaled in the All Time Spent field, which can be used in reporting or billing.
...