Configuring the Agiloft Contract Assistant for Outlook
Consult this page when configuring the Agiloft Contract Assistant for Outlook.
This process tells Agiloft which tables and fields in your KB should link to the fields on the app interface. This step must be completed before installing.
Prerequisites
Check to ensure your KB aligns with the recommendations below before configuring the app.
Inbound Email
Before you begin configuring the Agiloft Contract Assistant for Outlook, make sure to set up inbound email. Inbound email accounts hosted by Microsoft Exchange Online will only work with EWS or GRAPH protocols. For more information, visit Inbound Email Accounts.
Permissions
To use the app, users must have the following permissions set:
- Users must be granted access to REST services. Click the Setup gear icon and go to System > Manage Web Services. In Groups Allowed for REST, select all the groups that need to work with the app. To select multiple groups, hold the Ctrl key while making selections.
- Users must have at least create permissions for all of the tables included in the configuration wizard in order to use the app properly.
Configuring the Agiloft Contract Assistant
To configure the app:
- In your KB, click the Setup gear in the top-right corner and go to Email and SMS.
- Under Agiloft Email Apps, click Configure Agiloft Email Apps.
- Click New under Table Configurations. This brings you to the General tab.
- With the first drop-down list, choose a table that you'd like to use with Outlook. If your KB was created after April 2021, the Contract table is listed under Table Configurations by default.

- Under Add-in layout, choose the record fields you'd like to display as representation for records in the app in Outlook. It is usually best practice to select an ID field for the first option. Some other common options are fields that refer to titles, names, and workflow states.

- Under Inbound Email, choose whether the KB's inbound email account should automatically be CC'd on emails related to a record. This ensures that Reply-All responses are automatically saved to
Agiloft in addition to the original email.
- If you select the checkbox, you can choose an inbound email from the drop-down list or click New inbound email. For information on setting up inbound email, visit Inbound Email Accounts.

If you do not select the checkbox, you can click New email rules to create an email rule that pushes an inbound email similar to how it would be pushed from the app in Word to the Agiloft KB.

Inbound email is recommended but not required. Setting up inbound email is useful if you want to send an email to a third party and have their replies automatically recorded in Agiloft. If your inbound email address is hosted by Microsoft Exchange Online, CC-ing only works with EWS or GRAPH protocols. In this scenario, the default value of the "process_email_when_record_locked_by_user" global variable should be changed from -1 to 0 at Setup > System > Manage Global Variables.
- If you select the checkbox, you can choose an inbound email from the drop-down list or click New inbound email. For information on setting up inbound email, visit Inbound Email Accounts.
- Navigate to the Attachments tab. Using the first drop-down list, choose the table that holds files you'd like to access with the app. This is generally the Attachment table. The choice in this field determines the fields that are available in the two additional drop-down lists when they appear.
- From the second drop-down list, choose the field that holds the files you'd like to access with the app. This is generally the Attached File field.
- Next, select the field that links the table you selected in step 6 with the table you selected in step 3. The table name in the description for this option changes to reflect the table you chose in step 3. The example shows the Contract table.

- Click Save. If you would like to add more tables, start again from step 3.
The remaining two steps are only required for Agiloft systems running Release 22 or earlier.
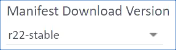
- Under Manifest Download Version, choose whichever option has "stable" in the name unless you have been instructed otherwise.
- Finally, click Download Manifest file to get a copy of the manifest file.
For information on installation, visit Installing the Agiloft Contract Assistant for Outlook.